自從 iphone 第一代從2007年初發表到現在已經過了六年之久了, 在 mobile 的 UI 設計上也逐漸的被整理出許多模式(Pattern)。其中一個很常用的模式就是使用 Tab 來切換不同的視窗內容。所以這篇文章會大致介紹 Tab 要怎麼使用。
 |
| Android 中 ActionBar 提供預設的 Tab 樣貌(圖片來自Android Developer官網) |
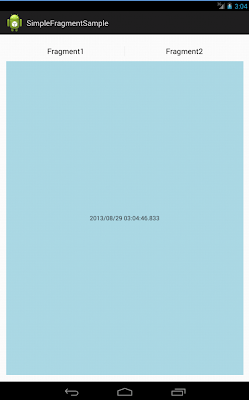
在 Android 2.3 之前, Android 尚未提供 ActionBar 的功能, 當時如果要寫一個頁籤的功能, 我們可以簡單利用橫向 LinearLayout 加上一排 Button 來完成。像下面的範例 :
 <LinearLayout xmlns:android="http://schemas.android.com/apk/res/android"
    android:layout_width="match_parent"
    android:layout_height="match_parent"
    android:orientation="horizontal" >


        <Button android:id="@+id/btn_fragment1"
           android:layout_width="0dp"
           android:layout_weight="0.5"
           android:layout_height="wrap_content"
           android:text="@string/fragment1"
        />
        <Button android:id="@+id/btn_fragment2"
           android:layout_width="0dp"
           android:layout_weight="0.5"
           android:layout_height="wrap_content"
           android:text="@string/fragment2"
        />
</LinearLayout> <LinearLayout xmlns:android="http://schemas.android.com/apk/res/android"
style="?android:attr/buttonBarStyle"
android:layout_width="match_parent"
android:layout_height="match_parent"
android:layout_width="0dp"
android:orientation="horizontal" >
<Button android:id="@+id/btn_fragment1"
style="?android:attr/buttonBarButtonStyle"
android:layout_width="0dp"
android:layout_weight="0.5"
android:layout_height="wrap_content"
android:text="@string/fragment1"
/>
<Button android:id="@+id/btn_fragment2"
style="?android:attr/buttonBarButtonStyle"
android:layout_width="0dp"
android:layout_weight="0.5"
android:layout_height="wrap_content"
android:text="@string/fragment2"
/>
</LinearLayout>  |
| 最後就會做成這個樣子, 範例程式可以在這邊下載 |
這種作法的好處是, Tab 的部份可以相容 Android 2.3 以前的版本, 不過因為我很偷懶沒針對 Fragment 做相容性處理, 所以 app 的最低 API Level 還是設在11。
ActionBar.Tab
在 Android 3.0 (API Level 11) 之後, Google 對 Android 進行了相當大的改革, 其中包含了提供了強大的 ActionBar。而 ActionBar 中提供了三種瀏覽模式(Navigation Mode), 其中一種就是提供了 Tab 的 UI 介面(本文第一張圖就是囉)。不過 ActionBar 到目前為止似乎還沒看到在 support library 中可以向前相容的作法。 也就是說, 如果你使用了 ActionBar.Tab 方式來處理 Tab, 那麼你最低的 API Level 至少必須設定到 level 11 以上。
而 ActionBar.Tab 其實是搭配 Fragment 來使用。那麼因為 ActionBar 至少要 level 11, 那我們的 Fragment 就不用費心的使用 support library 中的那些方式了。
因為 ActionBar 中的 Tab 其實相當簡單, 這邊就以上頭那個範例改寫, 直接切入如何實作。
第一步, 就是先設定好ActionBar 的 Navigation Mode
  @Override
  public View onCreate(Bundle savedInstanceState) {
    super.onCreate(savedInstanceState);
    setContentView(R.layout.activity_main);

    ActionBar bar = this.getActionBar();
    bar.setNavigationMode(ActionBar.NAVIGATION_MODE_TABS);
  }
接下來, 產生幾個 Tab 加進去, 這裡的 ActionBar.Tab 其實是個 abstract class。千萬不要天真的自己去繼承他, 直接使用原生提供的 actionBar.newTab() 方式產生就可以了。最後給它一個名字( Text ) 和事件的 Listener 就可以了。
 Tab tab = bar.newTab();
 tab.setText(R.string.fragment1);
 setTabListener(mTabListener);
至於事件的部份, 只要實作 android.app.ActionBar.TabListener 介面即可, 這裡它提供了三個不同的事件 :
- void onTabSelected(Tab tab, FragmentTransaction ft) :
- 當使用者點選到此 Tab 時觸發
- void onTabUnselected(Tab tab, FragmentTransaction ft) :
- 當使用者選擇其它 Tab 時觸發
- void onTabReselected(Tab tab, FragmentTransaction ft) :
- 當使用者原本就選了此 Tab, 又重覆點選了此 Tab 時觸發
第二個參數就是 FragmentTranscation 了, 這個部份我在 如何使用Fragment 這篇當中已經介紹過了。這邊當成參數傳入, 基本上就是讓我們不需要再另外透過 FragmentManager 來自己處理 Transaction。但要注意的是, 它所提供的 FragmentTransaction 物件不能呼叫 addToBackStack() 方法。如果你真得堅持要把這個動作加到 back stack 中, 那就自己透過 FragmentManager 去控制 Fragment 的切換吧。
另一個要注意的, 就是預設提供的 FragmentTransaction 物件不需要也不能自己呼叫 commit() 方法。這點官網中似乎沒有提到, 不過如果呼叫了, 程式執行時爆掉了你自然就會知道了......。
如果針對 Fragment 不需要進行太複雜的處理的話, 事件的處理上可以很簡單的寫成下面這樣 :
private TabListener mTabListener = new TabListener() {

   @Override
   public void onTabUnselected(Tab tab, FragmentTransaction ft) {
   }

   @Override
   public void onTabSelected(Tab tab, FragmentTransaction ft) {
      Fragment fragment;
      if(tab.getText() == getString(R.string.fragment1))
         fragment = new Sample1Fragment();
      else
         fragment = new Sample2Fragment();

      ft.setCustomAnimations(android.R.animator.fade_in, android.R.animator.fade_out);
      ft.replace(R.id.layout_fragment, fragment);
   }

   @Override
   public void onTabReselected(Tab tab, FragmentTransaction ft) {
   }
};
上頭的是直接使用 FragmentTransaction 中的 replace() 方法, 每次點到時都重新產生一個新的 fragment 物件。如果要有更好效能或保留 fragment 狀態的作法, 那麼可以自己試著改寫成使用 attach/detach 的方法。
 |
| 以上改寫成ActionBar.Tab 成品, 可以在這裡下載 |
請問有興趣接 out sourcing 的 case 嗎? thanks. if interested, mail liu.kuoping.tp@gmail.com
回覆刪除